This week is Halloween! It’s always been one of my favorite times of year. When I was little, we lived in a small town where you pretty much knew everyone and who lived in the house before them, and maybe even the people before that. So when Halloween rolled around, we set out up and down the streets visiting friends and neighbors and filling our bags with goodies. I remember there were costume contests at the fire station, costumes worn to school with parades around the gym or playground and those fun class parties. My mom has made many many yarn witches on tops of pencils and Kleenex ghosts on suckers in her day. She was up for any sewing challenge I threw at her. A zebra, a nun, The Statue of Liberty, you got it! She was on it! We always had to make a stop at my Great Aunt Bee’s for her famous popcorn balls while making our way around the small little town. We had a big Old English Sheepdog who my dad would dress up in overalls and greet the trick or treaters at our door with Ben the dog up on his hind legs wearing his bib overalls. Across the street at our cousins’ house, either my dad’s cousin or one of his older sons would sit still looking like a stuffed scarecrow on their porch and come alive when trick or treaters reached for the doorbell. Oh what fun we had!
We’ve done themes before where our costumes all went together, but this year, I let the girls choose random things. We just bring out the bin of costumes and see what fits and what things we can throw together to make some pretty cool costumes! This year, we’ll have a Rosie the Riveter, a pirate, and a little witch with a green face. The face is important and she usually tells everyone that she is going as a “witch with a green face just like the wicked witch in The Wizard of Oz.” Here’s a picture I’ll share of one year when we did go in our best Oz costumes years ago. The costumes were all made by my talented mom. I was the pregnant Wicked Witch of the West and our oldest daughter was Dorothy. My husband was the Scarecrow and my parents as the Lion and the Tinman. Unfortunately our youngest is so tall for her age that there was no way that Dorothy costume was fitting her. She desperately wanted all of us to go as characters from the Wizard of Oz, but it just didn’t happen. Maybe next year!

Along with Halloween this week, it’s also our oldest daughter’s birthday! Like me, this girl loves ice cream. I decided to make a layered ice cream cake filled with all her favorite flavors and treats. The great thing about ice cream cakes is that they can be made in advance and leftovers just go right back into the freezer so they last a while (unless you are like us and have that thing gone in a couple of days). Also, you can customize ice cream cakes with whatever flavors you like. My husband has even made me one for my birthday before and he doesn’t cook AT ALL so anyone can throw together an ice cream cake. My mom made me one for my birthday this year that was chocolate fudge and mint chocolate chip with a brownie crust, topped off with whipped cream and Andes mints!!!! It was awesome. So I may have given her a few hints of exactly what I wanted, but she took the bait and made the cake and this spoiled girl loved it!

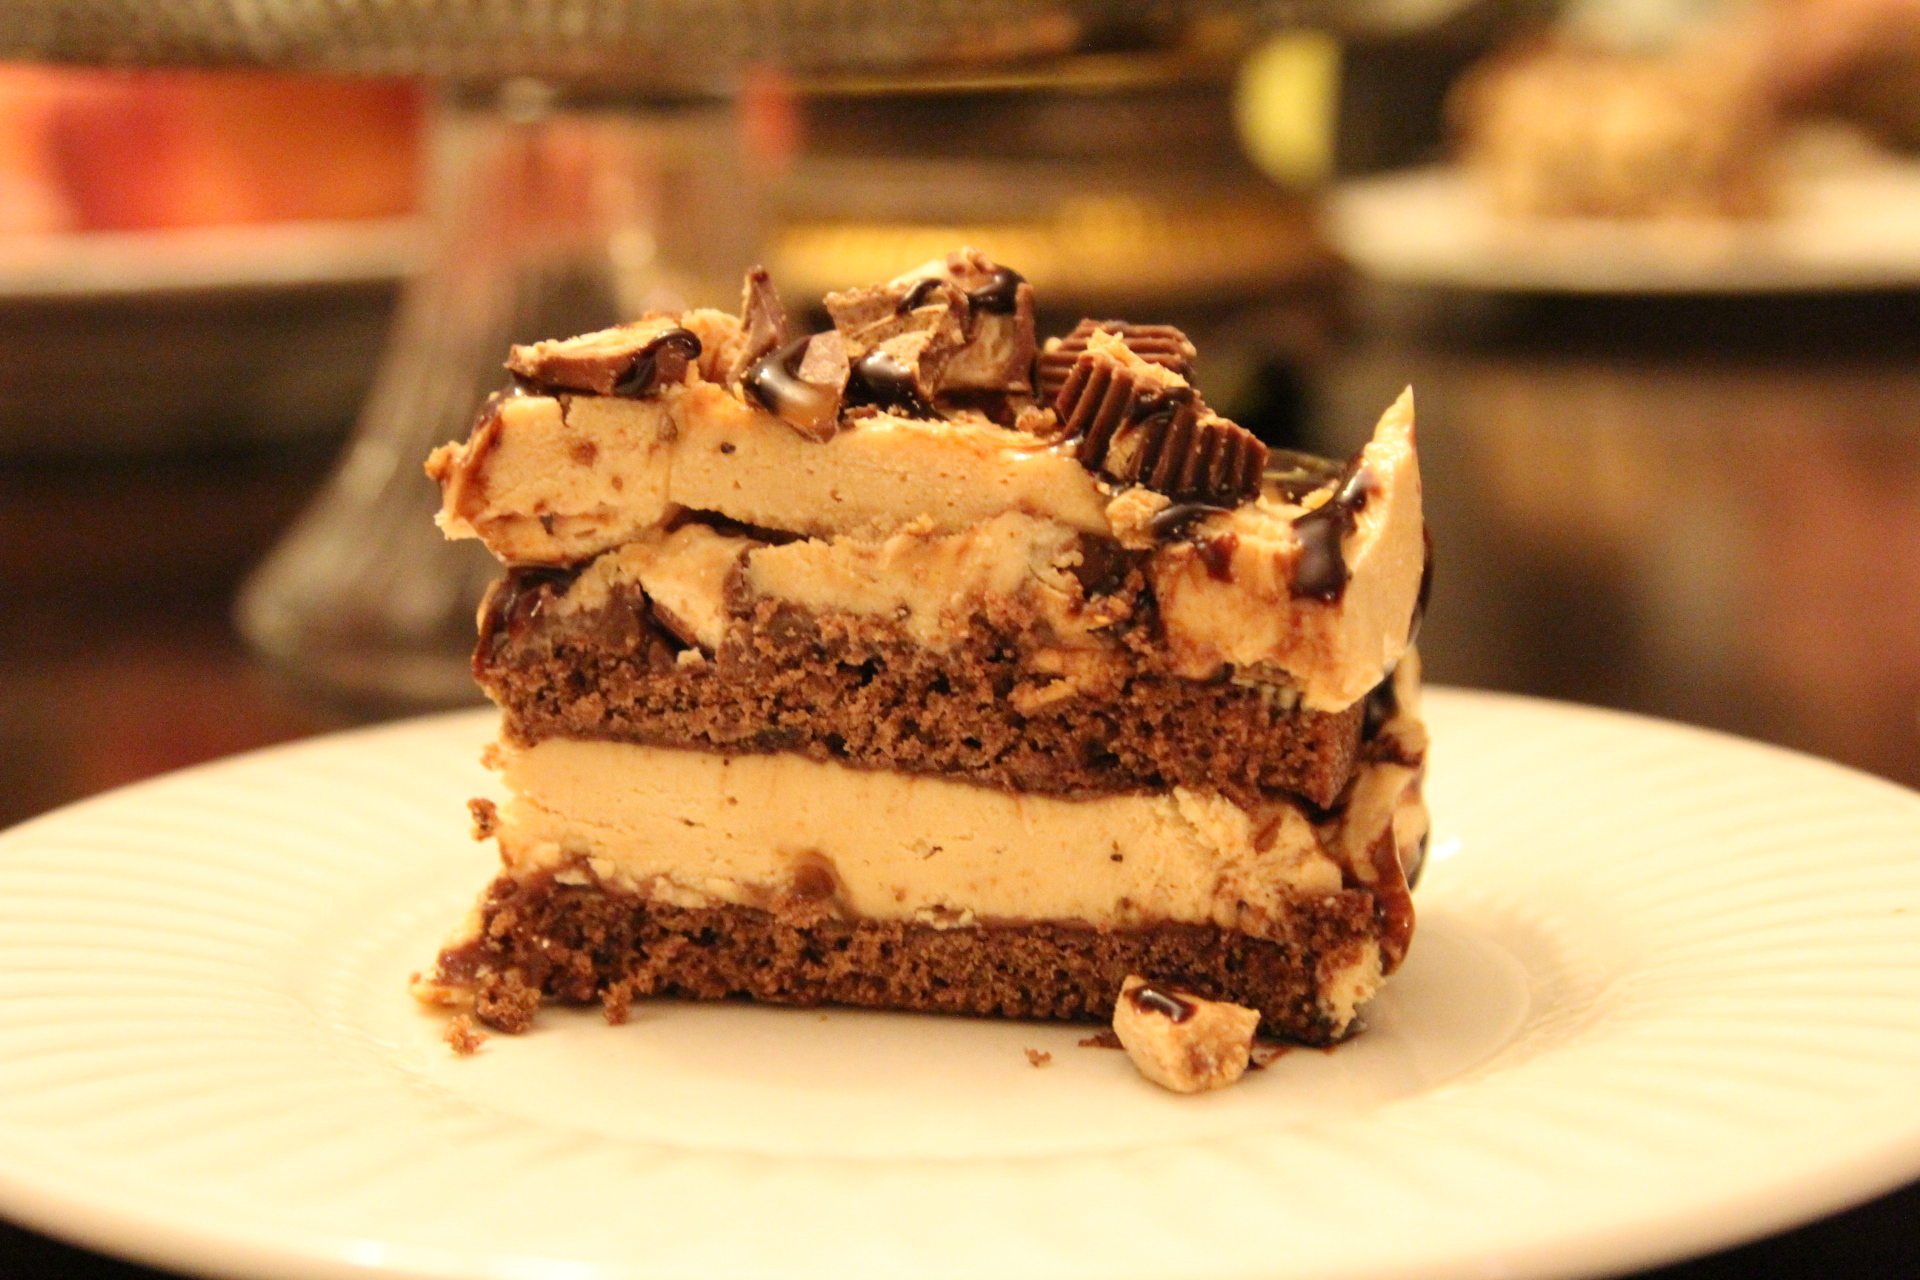
You can just layer crushed cookies and store-bought ice cream in different flavors and add whatever toppings you like, or you can take it to the next level and add in a baked brownie layer or two. That’s just what I did and it turned out amazing!
Since I wanted this cake to be a total surprise, I had to make secret trips to buy last-minute ingredients, make it in a couple of stages and hide all my evidence. I’ll share exactly how I made it, but you can change-up the flavors and toppings with whatever you like.
Layered Brownie Ice Cream Cake
Ingredients:
One box of brownie mix and all ingredients it calls for or make your brownies from scratch. I didn’t have any mix so I just made a quick batch from scratch.
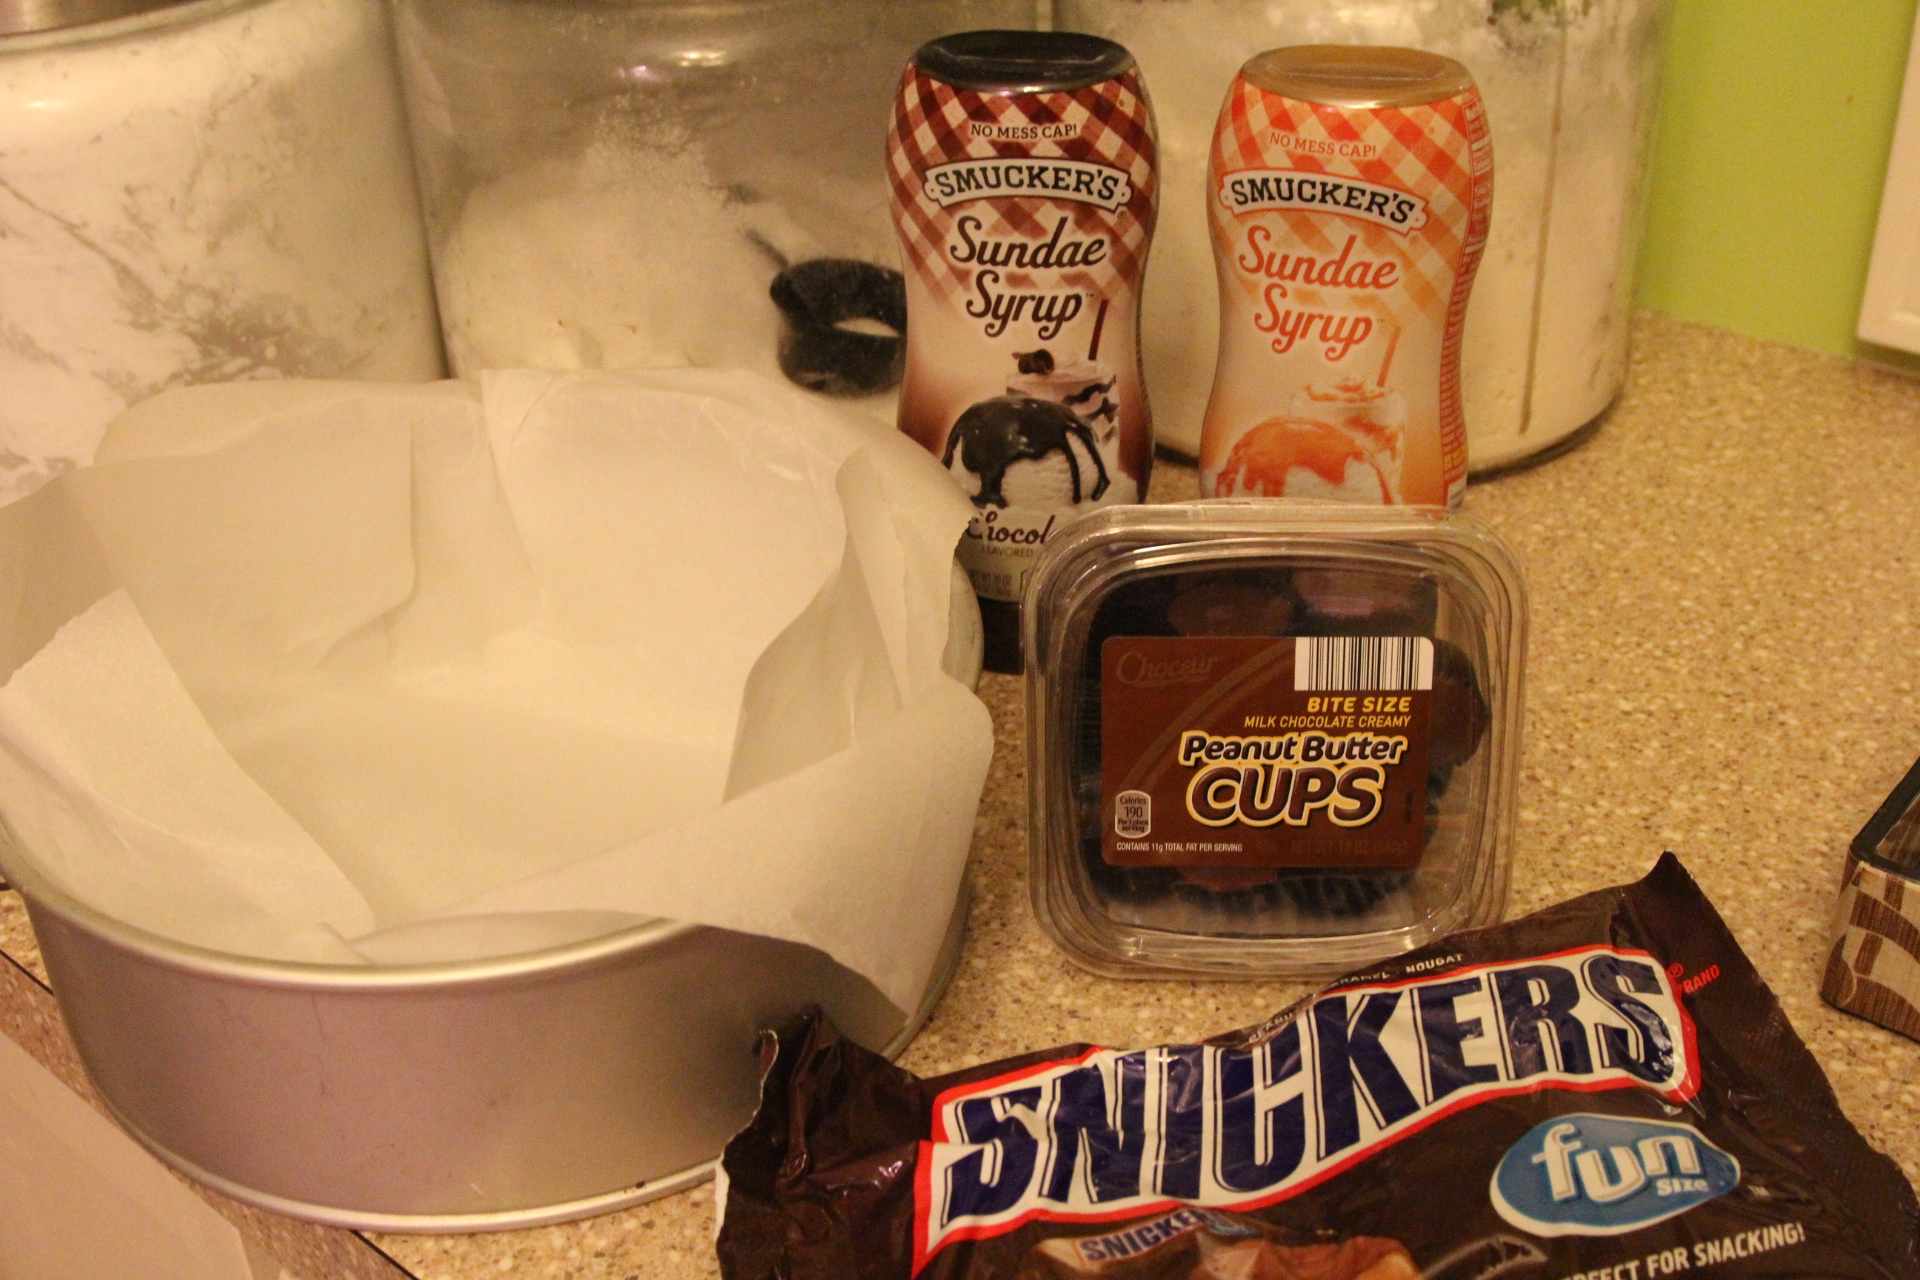
Caramel Syrup
Chocolate Syrup
Optional – Hot Fudge Sauce
8 oz of cream cheese – softened
1 C creamy peanut butter
1/2 C sugar
1/4 C milk
8 oz of Cool Whip or homemade Cool Whip which is 1 C heavy whipping cream, 1/2 C powdered sugar, 1 teas vanilla extract, optional 1 TBS flavored coffee creamer (I used hazelnut). OR, you could just use whatever ice cream you like here in place of the cool whip.
Chopped Snicker Bars (I used about 8 Fun Size)
Chopped Peanut Butter Cups (I used about 10 mini peanut butter cups).
Notes:
I like to make ice cream cakes in a spring form pan, but you could also use a loaf pan or any pan you like. The important thing is to use parchment paper to cover the entire bottom and all sides of whatever pan you use. this will help with removing the cake for cutting and presentation. Otherwise, you are going to have a mess on your hands!
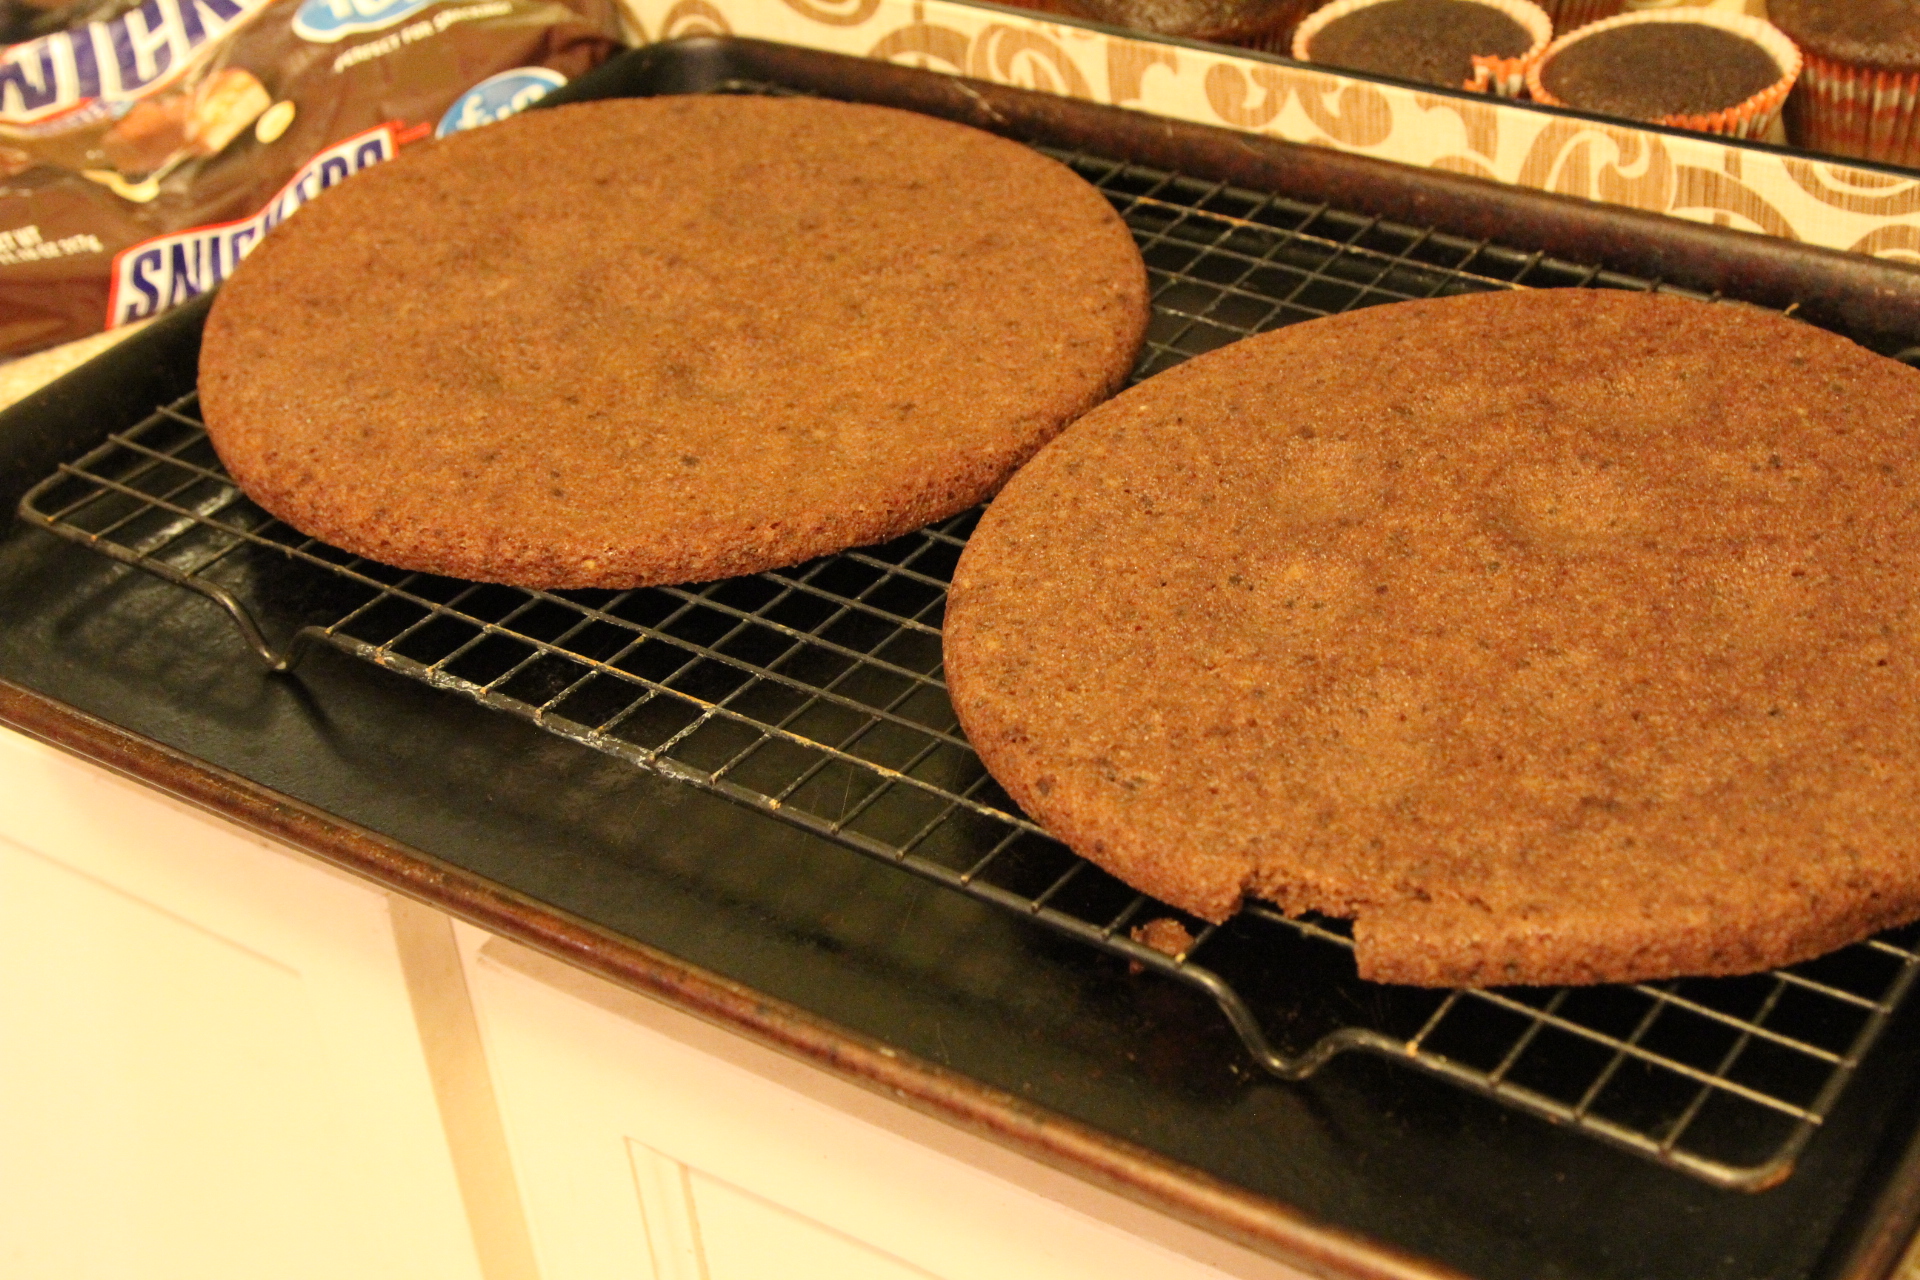
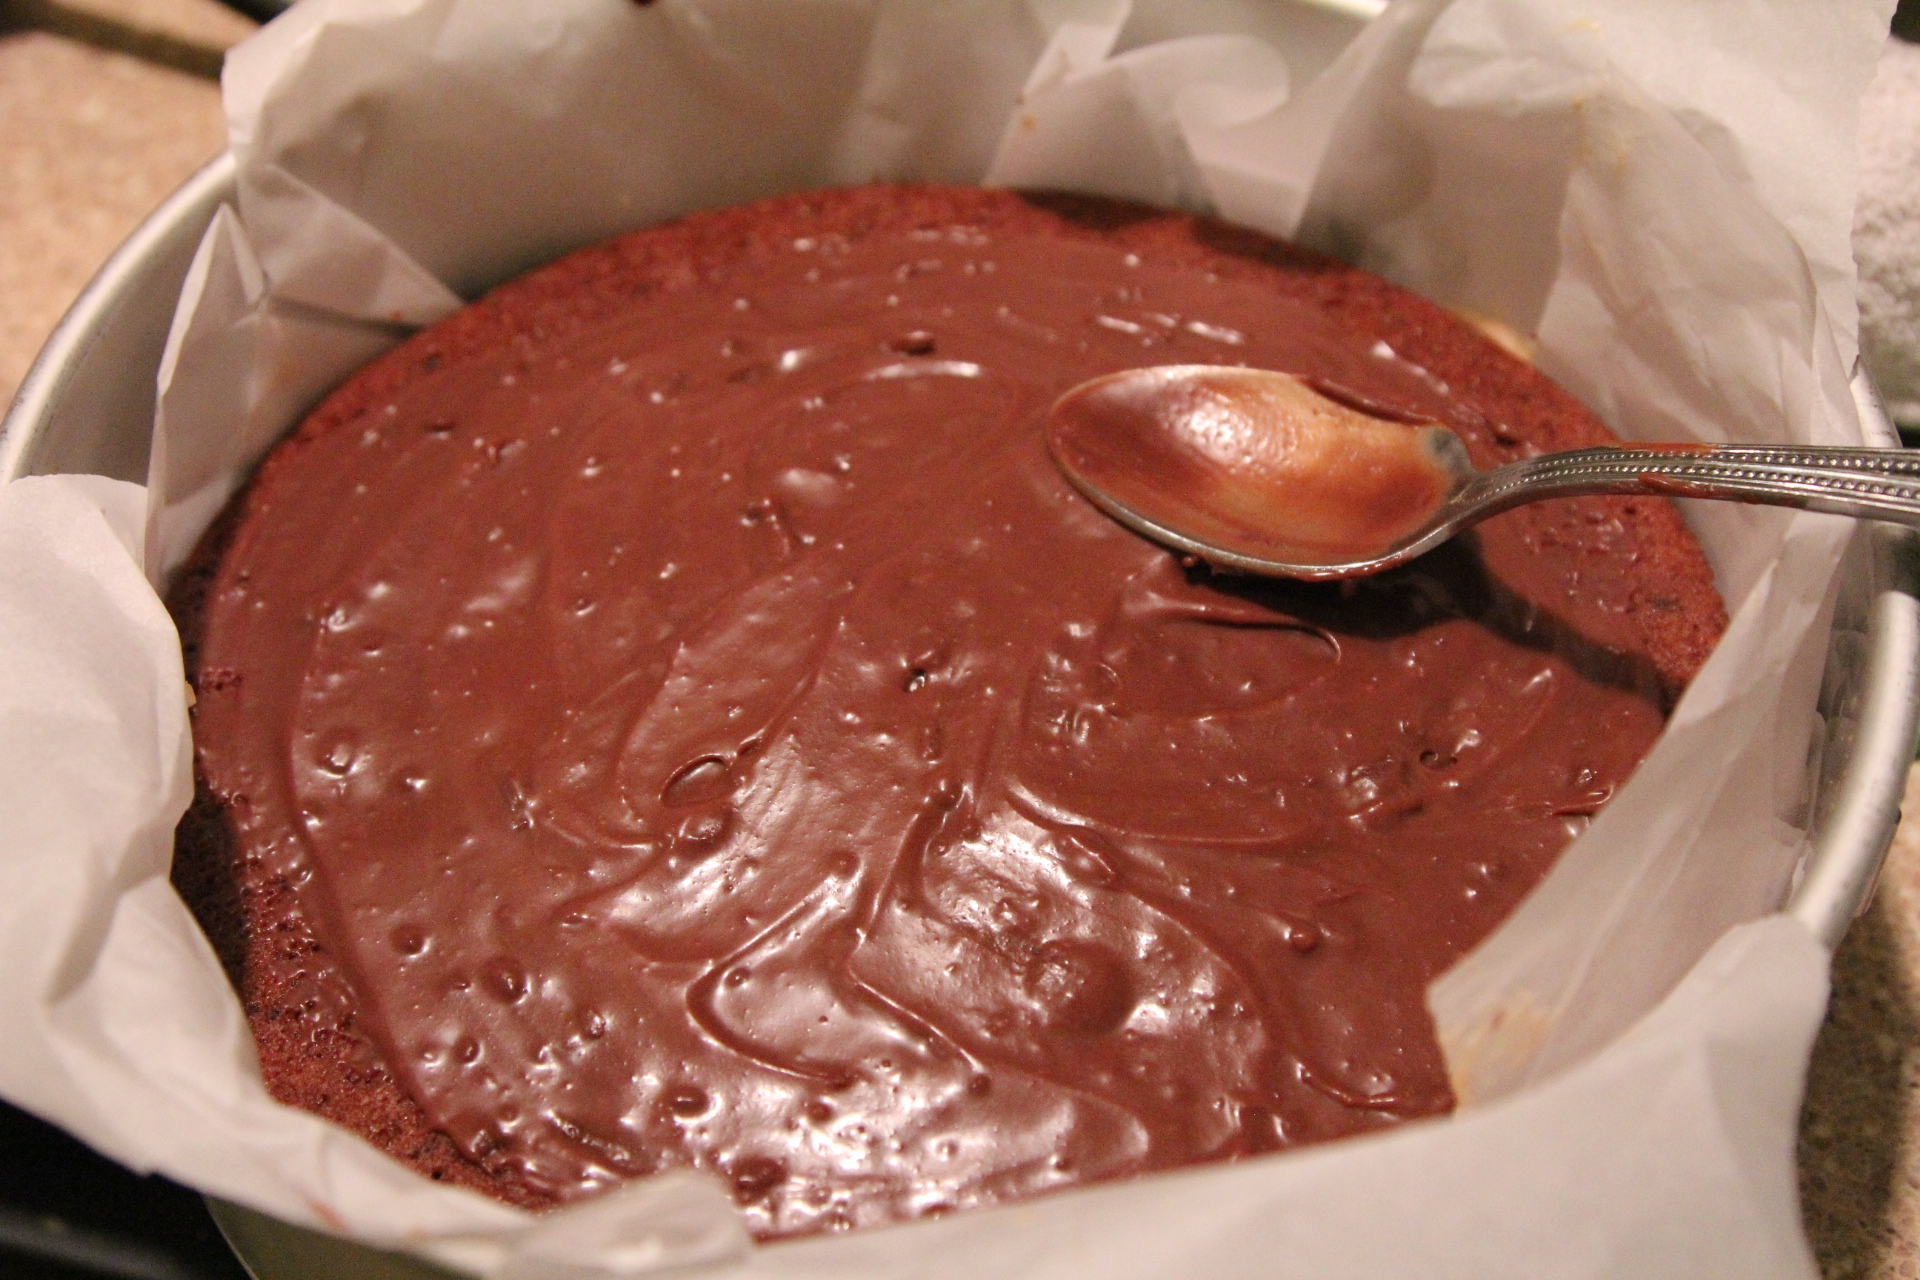
I used two round silicone cake pans to bake my brownie layers in because I knew I wanted a brownie crust on the bottom and another layer of brownies in the middle of my round cake. I made sure the silicone cake pans fit inside my springform pan so that the brownie layers would go in easily. You could also just bake your brownie layer in the bottom of your pan to act as a crust, but only use about half of the batter so your brownie layer isn’t too thick. Your brownies will not take long to bake if they are just in a thin layer so cut down the baking time as needed so they are not over cooked. You want them baked long enough that they can withstand you fumbling with them so don’t go for super soft crumbly brownies. You want a firmer, yet still soft brownie.
This recipe is peanut butter, chocolate, caramel, Snickers, and Peanut butter cup based flavors. If you don’t want or cannot have peanut butter, remove it from the recipe and make adjustments to fit your preferences.
Directions:
Make brownie batter and pour into greased pan(s). Once the brownie layer (s) are baked, cool and remove from pans. The recipe I used for brownies did not make much batter but that’s ok because I didn’t want super thick brownie layers. *Someone took a little piece off of the brownie! They deny it, but I know who you are!
Next chill your mixing bowl for your homemade Cool Whip if making your own. Skip the next step if using pre made Cool Whip or pre made Ice cream for this part.
Combine the heavy whipping cream, powdered sugar, vanilla and coffee creamer, if using and whip on high speed using a stand mixer or hand mixer. When stiff peaks begin to form, gently spoon the “cool whip” into a bowl and set aside.

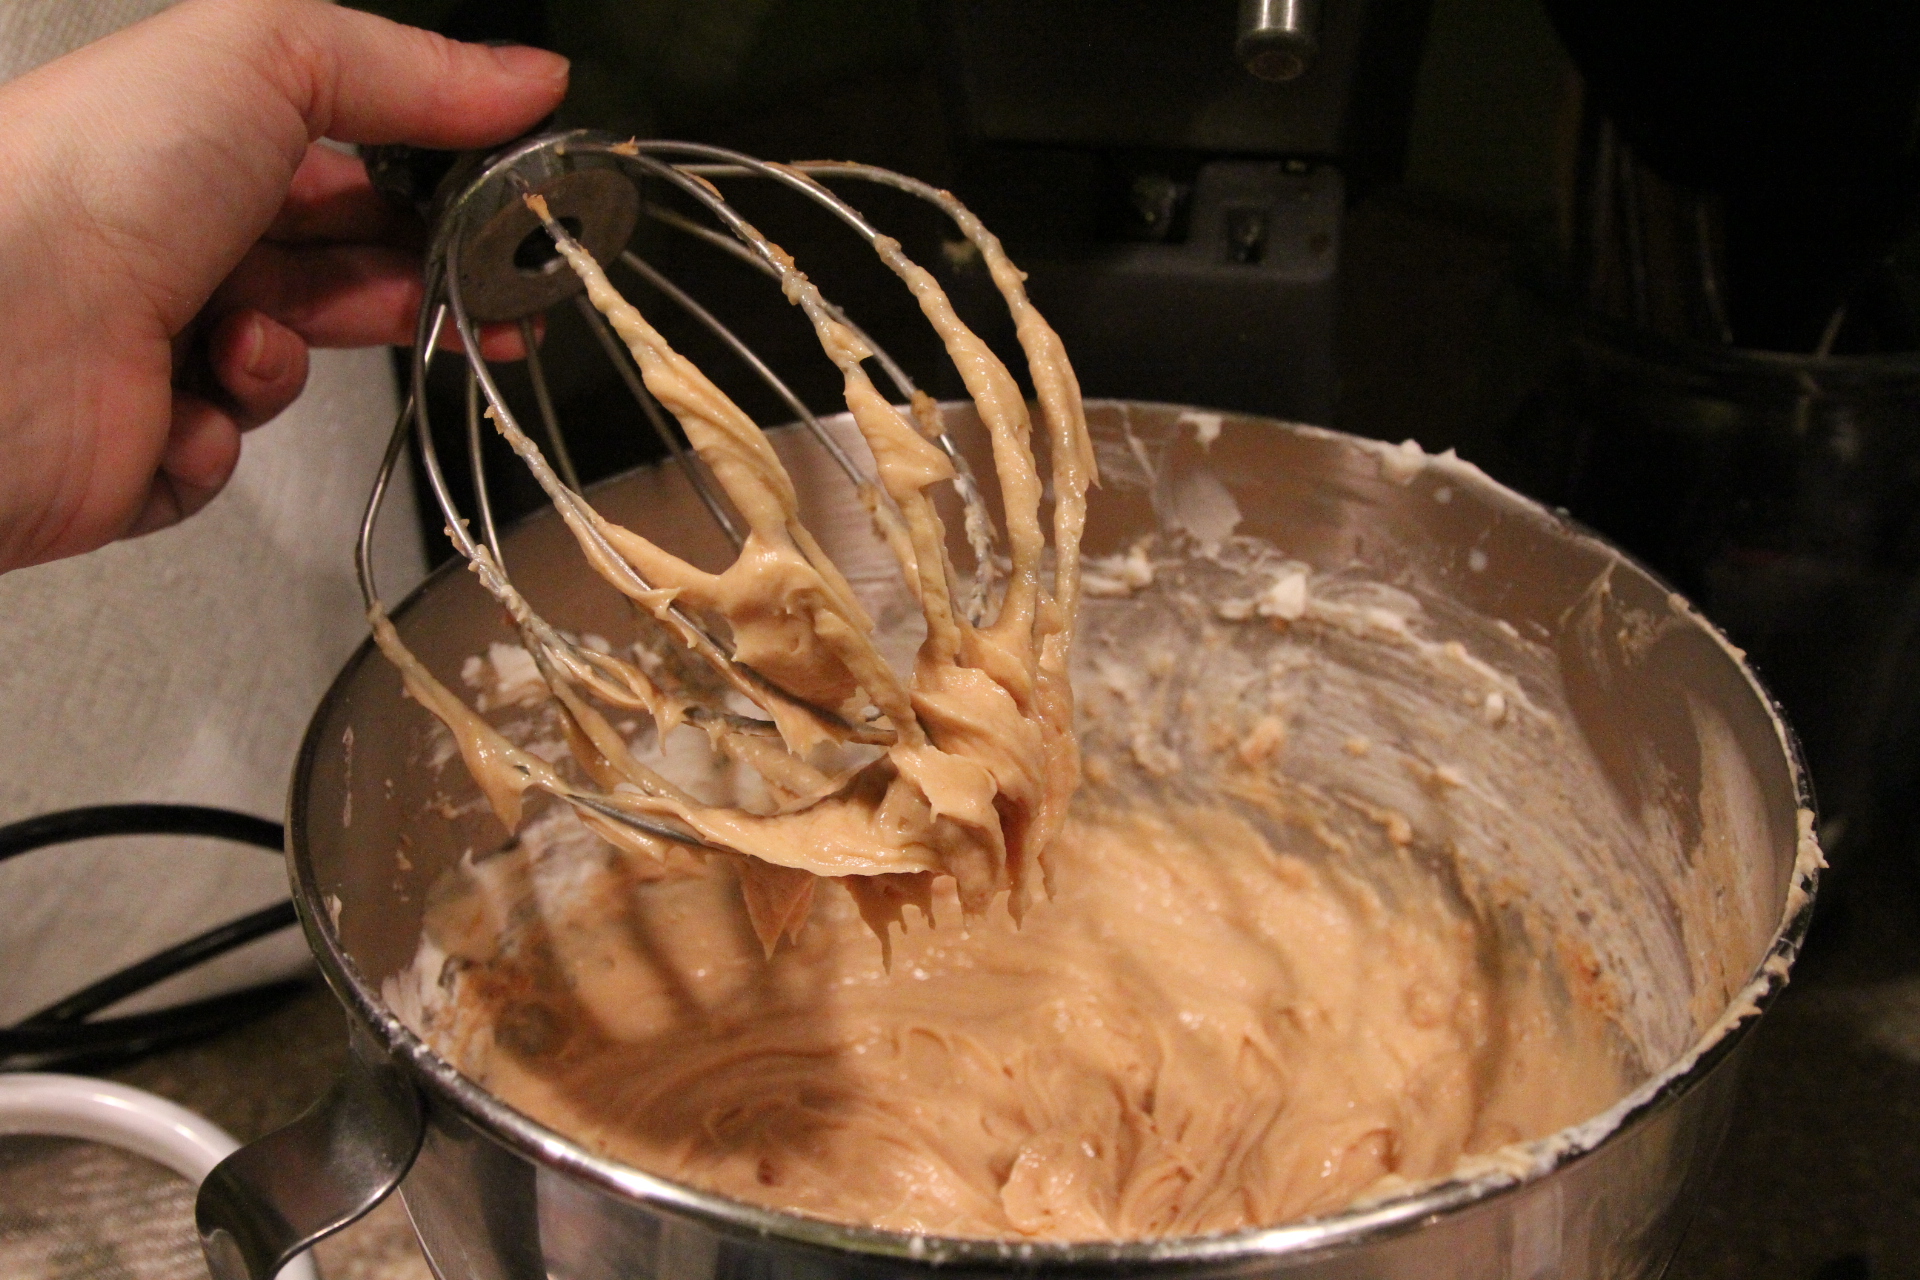
Combine the softened cream cheese, peanut butter, milk and whip using stand mixer or hand mixer. Once this is all smooth and combined, add in the cool whip (store-bought or homemade) and gently mix until combined.
Chop up your Snickers and Peanut Butter Cups
Cover your entire pan with parchment paper so all the bottom and sides are covered. It doesn’t have to be all neat and perfect.
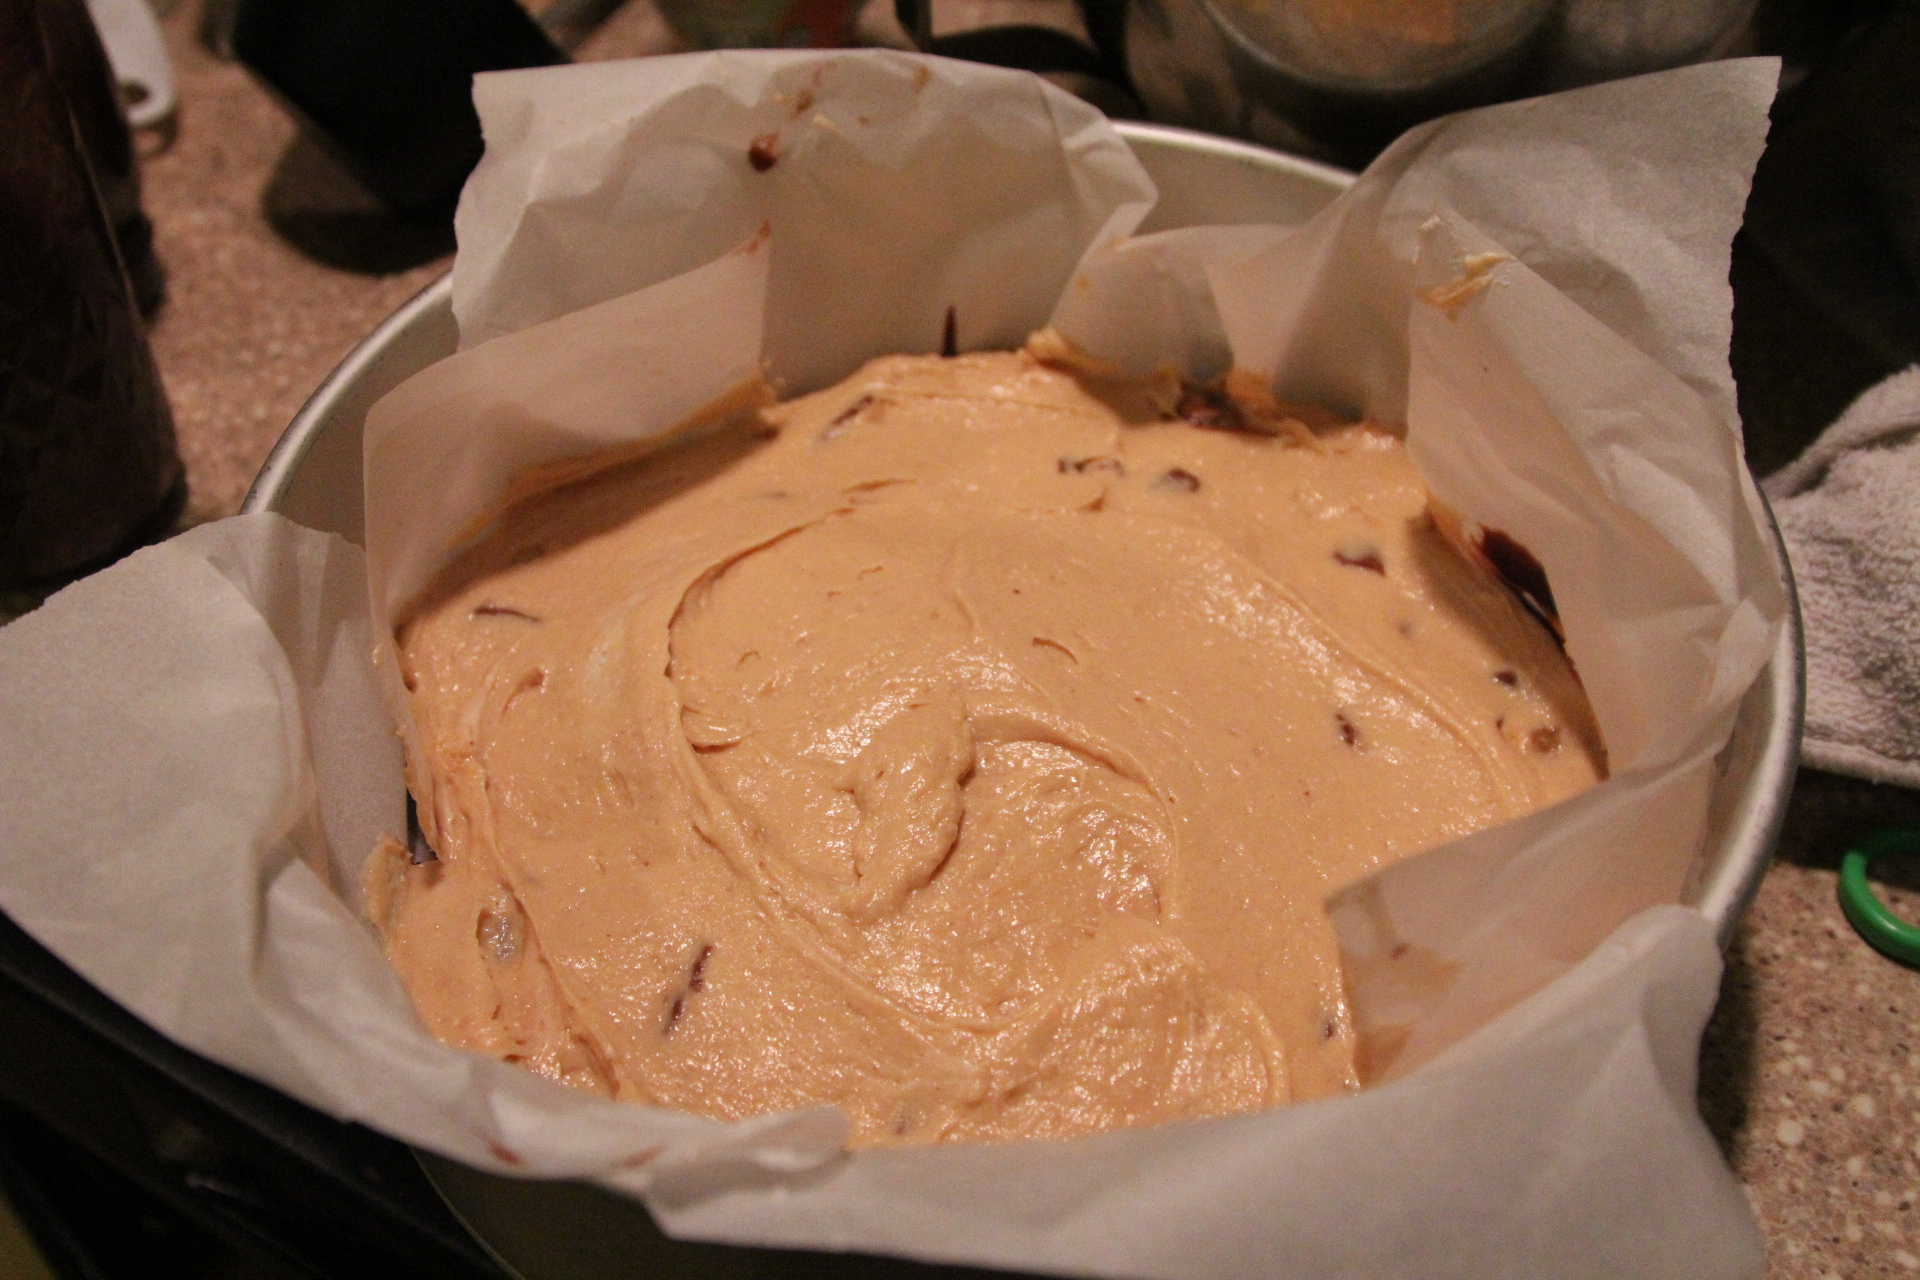
Place your first brownie layer in the bottom of the pan and gently press down so it sits evenly. Gently trim off around the edge if your brownie layer is too big for your pan.

Spread Hot fudge sauce, if using and drizzle chocolate and peanut butter over brownie layer.
Add about half of the chopped Snickers and Peanut Butter Cups.

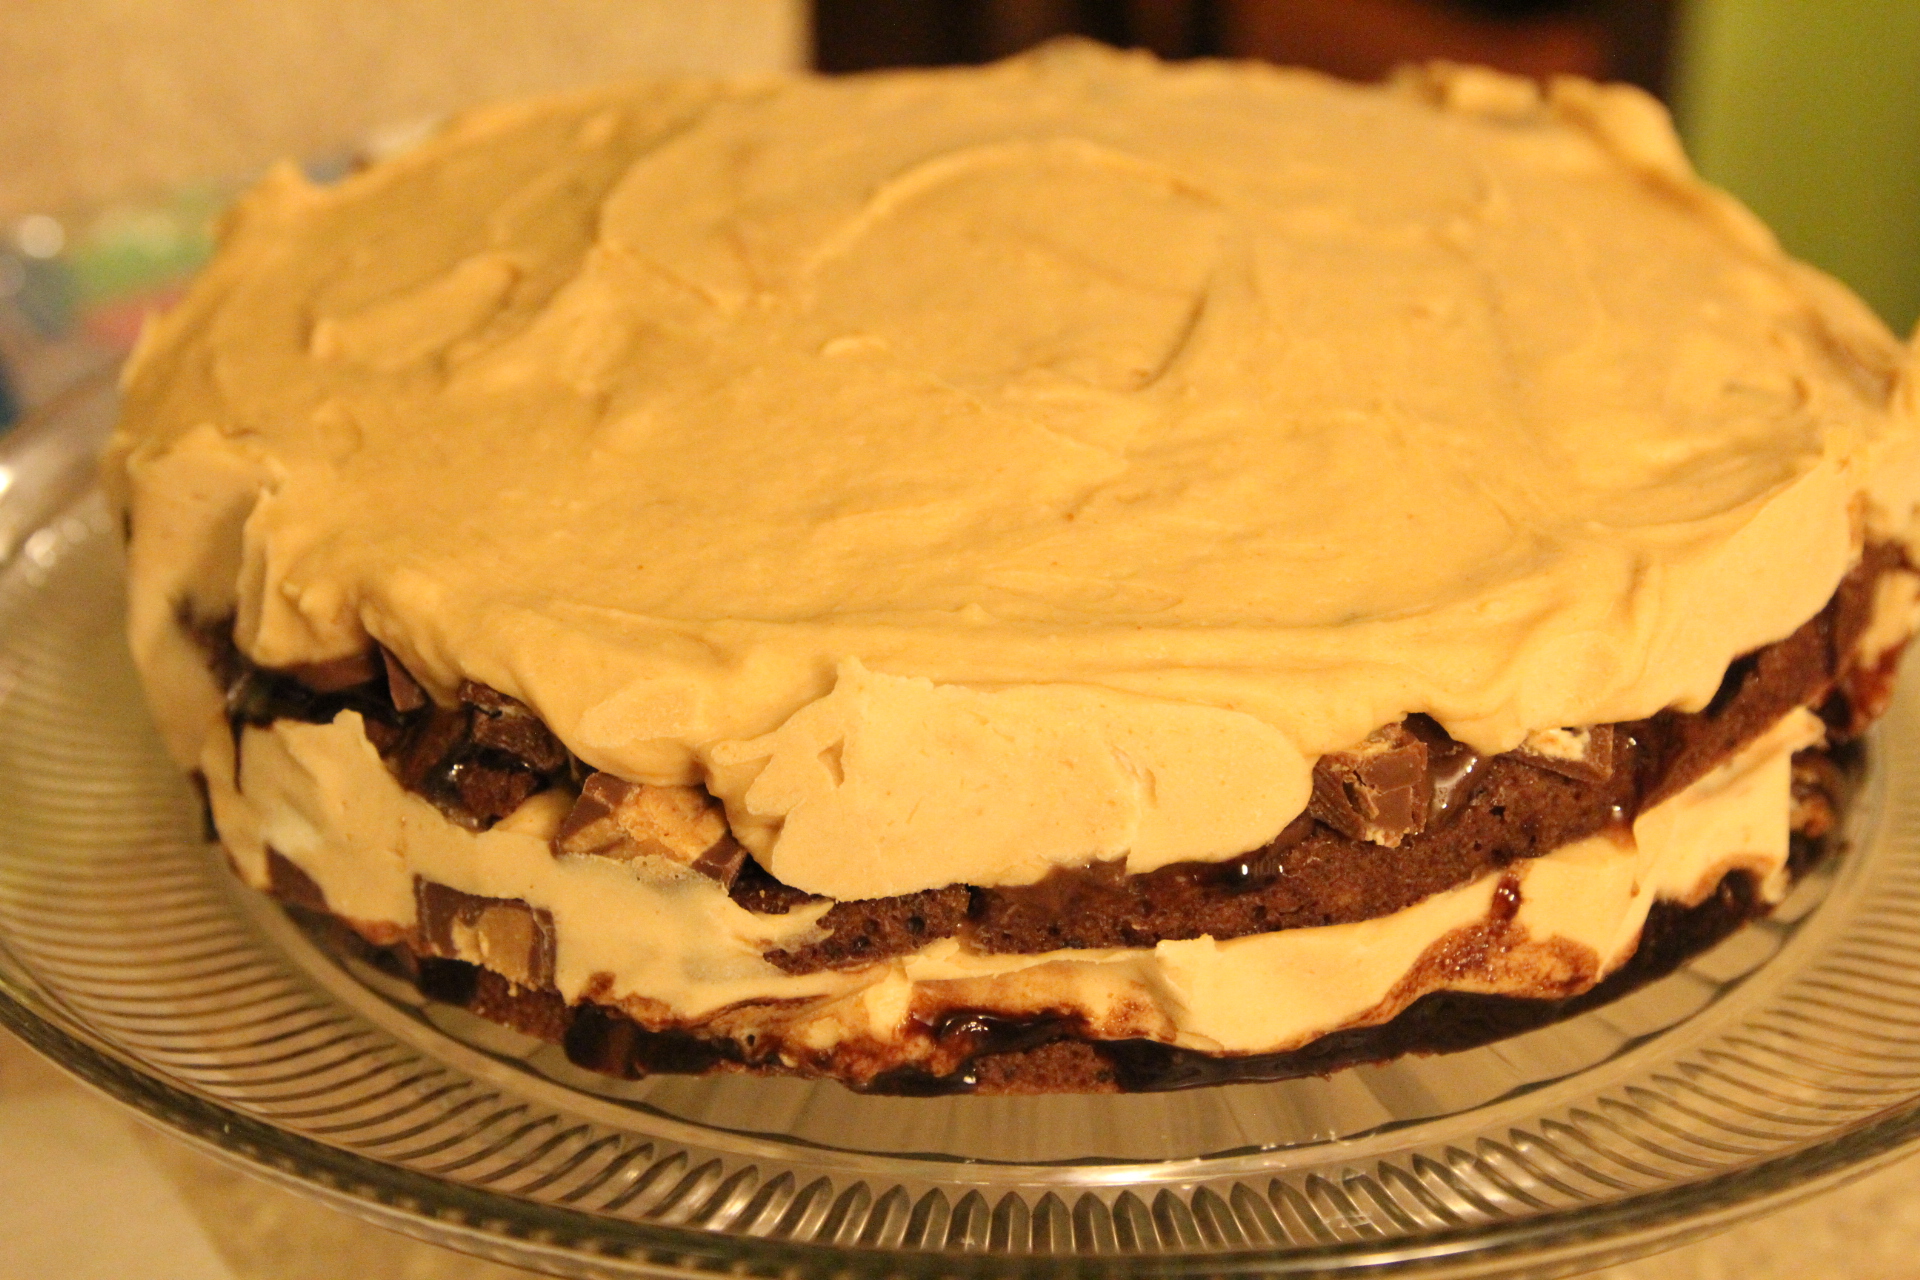
Spread about half of the the Peanut Butter Cool Whip mixture over the top.
Layer your second brownie layer and repeat with the hot fudge, caramel and chocolate sauce and then chopped snickers and peanut butter cups. Be sure to save some of the chopped Snickers and Peanut Butter Cups for the top of the cake.


Spread the remaining Peanut butter Cool Whip mixture over top.

Freeze the cake overnight or at least 2 hours so it is set up.
About 10-20 minutes before serving, remove the cake from the freezer and remove from spring form pan, carefully remove the parchment paper from the sides and bottom. I used a spatula to help hold it up while I peeled the paper away. You may want a helper for this step.

Place your cake on your serving platter.
And then top with more chopped Snickers and Peanut Butter Cups and chocolate and caramel sauce.
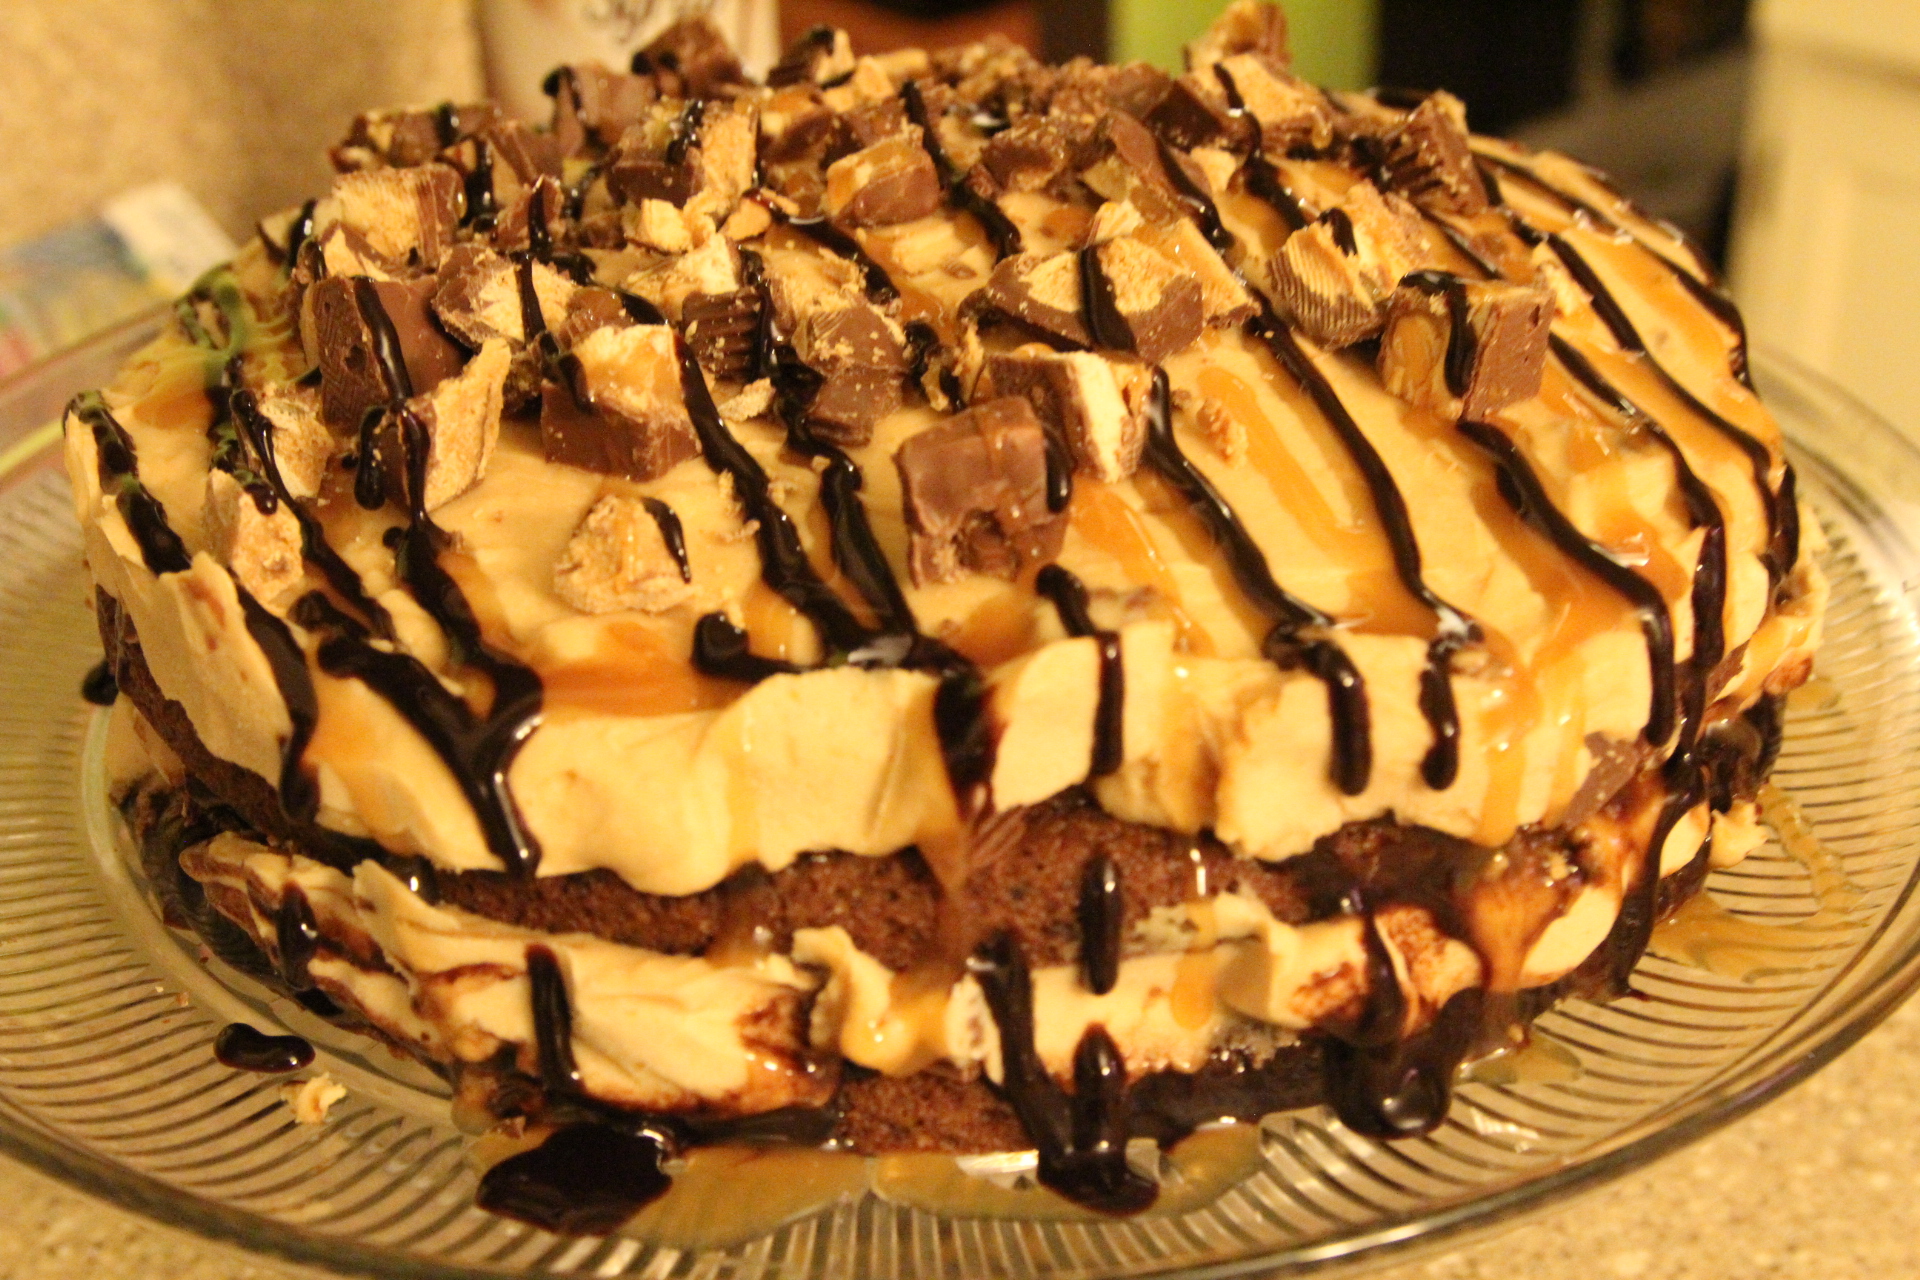
Slice and serve.

Definitely need a tall glass of water or milk to wash this rich dessert down!

Place any leftover cake back in springform pan and return to freezer.
Enjoy!


Yummy..
LikeLike